Explanation of the GeoTectAI_CNN project
Preface
The project uses PyQT5 development technology and relies on the Python language. This software’s code style is not recommended for learning purposes, as it’s my first time writing desktop software in Python. For those accustomed to using WPF‘s Xaml programming, PyQT5 is quick to get started with but still a nightmare to write, at least for this attempt. The software does not use any architecture, making maintenance a challenging task 🤮. I will try my best to ensure it is free of any severe bugs.
For me, the experience of completing this PyQT5 project is unforgettable. Although I love programming, it’s the first time a software project has made coding feel irksome. Perhaps it’s due to my unfamiliarity with the PyQT5 library or my over-reliance on the convenient tools provided by Microsoft 🤔.
During a break, I grabbed a banana and felt like a monkey. Not only did I not understand what others were saying, but I was also eating a banana on the side 🍌.
GeoTectAI_CNN Overview
This project uses PyQT5 as mentioned earlier. Writing desktop software with Python 3.10.14 has felt catastrophic, especially during packaging. The project’s goal is to use basalt‘s more dimensional geochemical data to differentiate tectonic settings categories by training a convolutional neural network with 42 feature elements.
Thanks to the libraries and their developers, this project primarily relies on the following libraries (in addition to the Python standard library):
- QFluentWidgets
- Matplotlib
- PyQt5
- numpy
- PyTorch
If you want to compile this project further, please install the libraries mentioned above first. The software will only be packaged for Windows, and it might be a bit large. I am not very skilled at packaging Python projects.
If you encounter any problems during use, feel free to leave a comment under the project’s Issues.
Dataset
Data is sourced from the large geochemical database GEOROC (🌹Thanks to the database and numerous researchers for providing data support🌹). The project’s training dataset will be stored in the project’s DataSet folder. I will later publish and explain the specific data and preprocessing procedures.
Convolutional Neural Network Model
The model structure will be announced in due course. The code for training, testing, and interpreting the convolutional neural network model will be stored in the ML_Code folder.
Please note: when calling the related code, make sure you have installed the necessary packages.
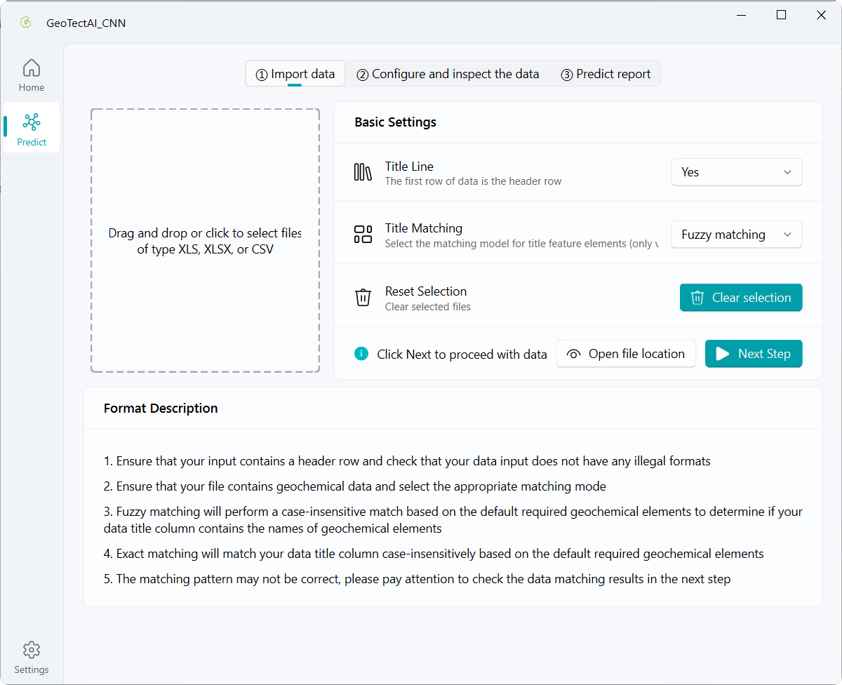
Software Workflow
The software is divided into: Home, Prediction Module, Settings Module.
- The home screen displays relevant instructions.
- The prediction module consists of three processes:
- Import Data, where you can perform initial settings like setting the title row and auto-match mode.
- Validate and Match Data, inspecting and matching the imported data to establish mapping for the next prediction step.
- Model Prediction, where I’ve implemented multi-threading. However, I suggest avoiding any illegal operations during prediction. After prediction, results will be displayed on related cards. You can click on an item to view its specific prediction probability. We will add the prediction result to the last column of the data and name the last column
predict_res. You can view the predictions by exporting the results.
- In the settings, you can switch themes, styles, languages, and other options.
Since this software is entirely developed in Python, I don’t need to call deep learning code via third parties, making the project code relatively straightforward.
Screenshots